


Olson Wing and Damped Pendulum Suspension
Posted by Tom Benedict on 24/09/2015
One of the earliest experiments I did with aerial sound was to pop a windjammer on my Tascam DR-05, bolt it into my KAP rig, and send it aloft. I learned a couple of things from that flight: KAP electronics cause gobs of EM/RF intererence, servo jitter is incredibly loud, and the PeKaBe blocks in the Picavet suspension never ever stop making noise. I decided to solve all three problems by skipping the Picavet, using a pendulum, and losing the servos and electronics altogether.
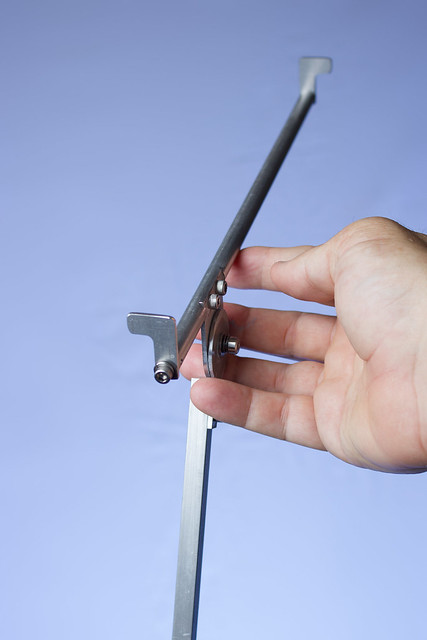
I’ve wanted to built a damped pendulum KAP suspension for a while. My earlier designs involved a parallelogram section with four pivots and a straight section with a single pivot to minimize swing from changes in wind speed. I still think that design has a lot of promise and I’d eventually like to get back to it. For this, though, I only built a single straight section with a single pivot. It’s the easiest way to start playing with pendulum suspensions, and will let me figure out what the real design issues are. The pendulum I built has a pivot faced with a pair of 1-1/4″ disks of metal. I lapped the two plates together and filled the gap with Nye damping grease. The resulting joint is very quiet, smooth, and damps motion. There’s not as much damping force as I’d like, but that’s why it’s a prototype. I’m experimenting! As with any KAP project, as I was putting the finishing touches on the pendulum and loading the pivot with damping grease, the clouds opened up started to rain. So testing will have to wait.
The other project I finished over the weekend was an Olson Wing microphone array, based entirely off of work by Curt Olson. Since the intent is to fly this from a kite I designed in wind protection from the get-go. The Olson Wing has an upward component to its sensitivity, so I built a 30 degree triangle into the back to angle the mics and baffles toward the source. Both legs of the triangle have 1/4″-20 threaded sockets in them. One allows me to use it on the ground, and aims the array for horizontal use. The other allows me to use it from the air, and orients it for downward vertical use. In both cases the range of motion from the tripod heads let me aim it in any number of directions. Unfortunately the photos I made of the Olson Wing looked horrible, so I’ll have to try again at a later date.
I had a little more opportunity to test the Olson Wing than I did the pendulum suspension. Some tests in 8-12kt wind showed that the furry windjammer does indeed work. On the advice of David Brinicombe from the Yahoo! Nature Recordists’ Group I added a 40Hz low cut filter, and almost all the wind noise is taken care of. Ready to fly!
While testing the Olson Wing I discovered something cool with my light stands. Two of them have 3/8″-16 threaded tips, and the other two have 1/4″-20 threaded tips. The 1/4″-20 stands can take the same mini ballhead I use on my photography pole. Depending on the mood, I can’ use them to stick a fixed angle camera 12′ up in the air, or I can bolt my KAP rig upside-down on top using my pole adapter, or I can stick either my SASS or Olson Wing on top and have a very portable self-contained field kit for doing stereo ambient recordings. Or I could use it to hold a light and modifier, the way it was designed. I love finding new uses for existing equipment!
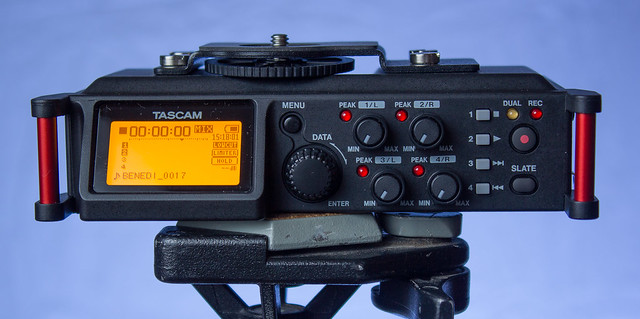
Two other things happened later in the week that are also moving the kite aerial sound project forward. The first was the arrival of my second sound recorder, a Tascam DR-70D. It’s a hefty little brick of a thing, so I don’t think I’ll fly it on a kite any time soon. But it’ll be perfect for recording sound on the ground, including line scream. Which brings me to the other thing I did this week.
I built a contact microphone. Zach Poff has a nice article on building a contact mic with an impedance matching buffer circuit designed by Alex Rice. You can wire a piezo disk directly into a 1/8″ (3.5mm) microphone plug and plug it into a laptop or a recorder like the DR-05 or DR-70D. But the combination of the low capacitance of the disk and the low impedance of the recorder input effectively results in a high pass filter that cuts sound below a few kilohertz. This is why contact mics have an unfair reputation of sounding tinny. The impedance matching buffer solves this by presenting the piezo element with several megaohms of impedance, and providing an impedance-matched input to the recorder. The mic I built has remarkably good bass response. So far I’ve only played with it by recording things like kettles boiling and sinks running, but it should be a simple matter to attach it to a hoop winder to pick up the sound off of a kite line.
All in all it was a good weekend and a good week. If the weather holds I should be able to test out almost every combination of ground and air recording, as well as recording line scream. By the end of it I hope to have answered most if not all of my outstanding questions about the how-tos of kite aerial sound, and an idea of what I need to pursue it further.
– Tom

Leave a comment