


Testing the Helmet Cam
Posted by Tom Benedict on 27/05/2014
In my previous post I described the design(ish) and build of a helmet cam with a reflex sight. Over the last few days I had the chance to take it out and use it on two separate occasions for two very different purposes. Here’s how it went:
Outing #1: Documenting Kite Aerial Photography
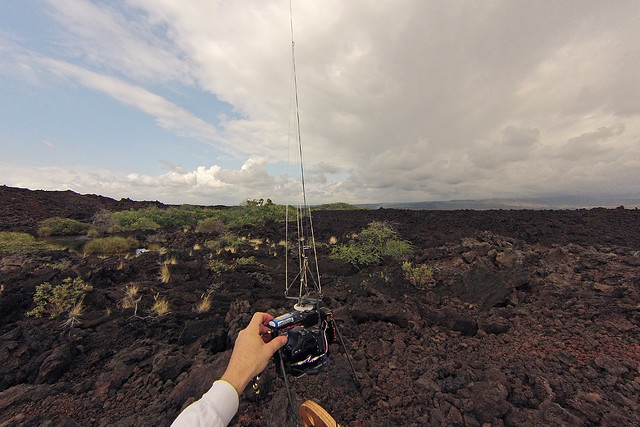
One of the reasons I built the helmet cam is that I want to document how I do kite aerial photography. There seems to be a lot of confusion when it comes to things like attaching the camera to the kite line, how the kite goes up the line (hint: it doesn’t), and why KAPers insist on using single line kites instead of two-line or four-line kites. A good set of still photos or even a short video could answer most of these questions. I’ve tried photographing the process of doing KAP in the past, but without a second person to operate the camera it’s just not possible. Enter the hat cam.
To try this I took it with me on a recent outing to the anchialine ponds near the old village of Wainanalii. The ponds are out in the middle of a lava flow, so the only way to get there is on foot. I parked my car off the side of the Queen Kaahumanu Highway and walked in.
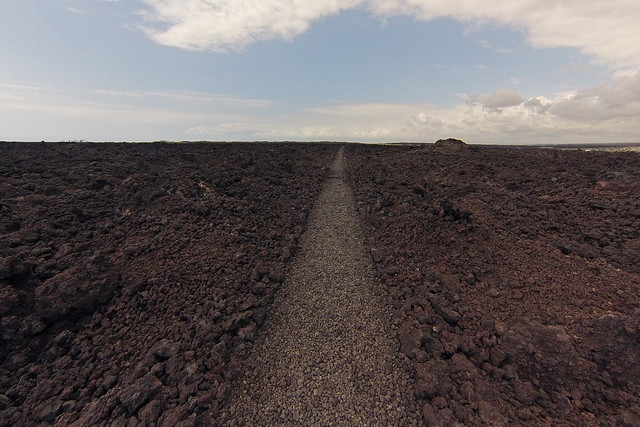
A short way in off the road you run into the King’s Highway. This is a trail system commissioned by King Kalakaua in the 1870s. Considering when it was built it’s a remarkable piece of engineering. It runs straight and flat for most of its length, and it spans much of the north Kona coast. I took it from where I parked my car to the turnoff for the anchialine ponds.
As I walked down the King’s Highway I became painfully aware that I had a kiawe thorn stuck straight through my shoe and into my foot. Every time I stepped on a rock my foot was stabbed. Right about the time I reached the turn-off to the ponds, I remembered I always pack pliers in my KAP bag. YAY! I pulled out the thorn and kept going.
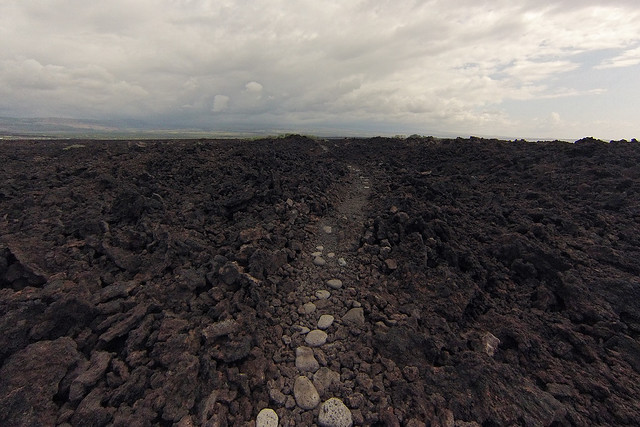
The trail to the ponds is a little more rough and ready than the King’s Highway. It’s in reasonable shape, but there’s no doubt you’re walking on rocks. It only takes a couple of minutes of hiking the trail before you reach the ponds.

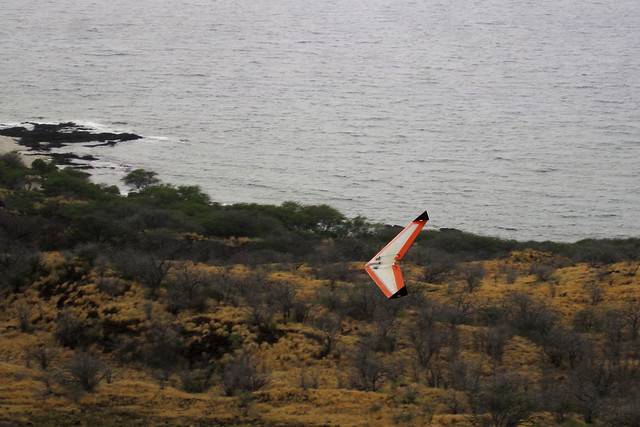
This set of anchialine ponds are sometimes called the Golden Pools for obvious reasons. The color comes from the plants growing on the rocks in the water. As pretty as it is from the ground, it’s even more striking from the air.
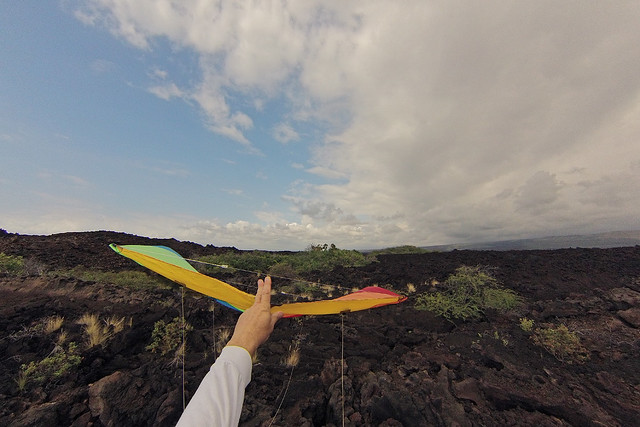
The ponds are in the middle of a relatively fresh lava field so the rocks are sharp enough to cut kite line and shred kite cloth. Since the entire island is volcanic, the same can be said of a number of places I fly. I long ago learned to hand-launch my kites. Long-line launches are simply out of the question.
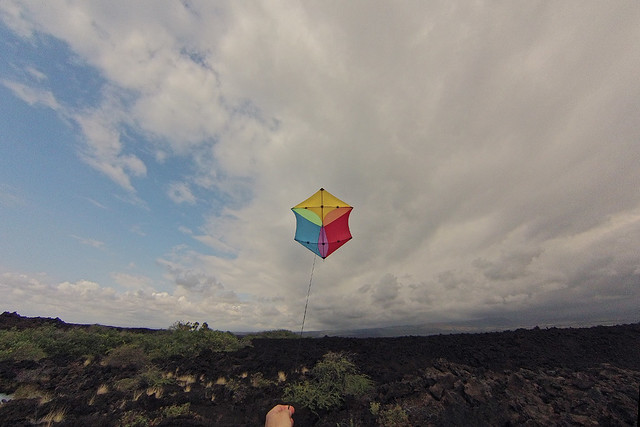
Once the kite was up it flew beautifully. The wind has been squirrelly the past few years, but it seems that the end of the drought we’ve been having has brought back the steady winds I grew used to when I first started doing KAP here in Hawaii back in 2007. I let out about 150′ of line before hanging the rig on the line.
The reason most KAPers hang their camera well below their kites is that the more line there is between the camera and the kite, the less the motion of the kite can influence it. Even a relatively stable kite will cause some camera wobble if the camera is suspended directly below the kite bridle. But with even 50′ of separation that motion can be reduced to a slight sway.
The rig is attached firmly to the kite line using snap hooks. The hooks don’t move on the line, so the camera is fixed to that point. All that’s required to raise the camera is to let out more kite line. To bring the camera back down it’s a simple matter of reeling the line back in.
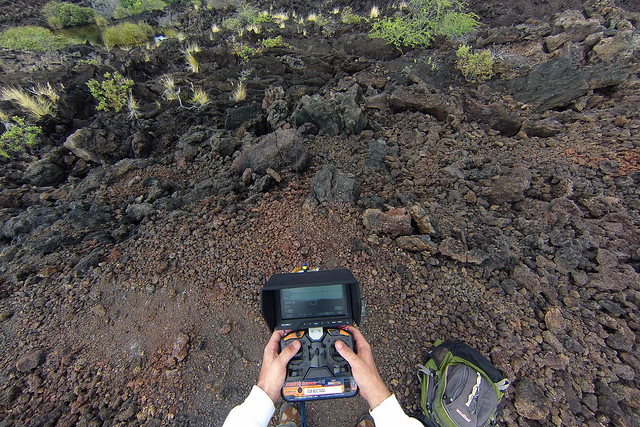
After letting out some line to give the camera some altitude, it was time to do some kite aerial photography. The rig I’m using has two axes of motion: pan and tilt. Some while back I added a video downlink, but it’s not necessary to use it. I did KAP for years aiming by eye and produced some good photos this way. When I added the video link to this rig I did it in such a way that I could bypass it any time I wanted to.
That being said, the viewfinder is handy for tricky subjects or for tricky situations like the one I encountered that day. The sky was blah overcast which caused nasty reflections in the water. I stuck a polarizer on the end of my lens to cut the reflections, but because of the overcast conditions it was very sensitive to orientation. The viewfinder helped me tune the filter’s orientation at each pointing before tripping the shutter. Here are the results:
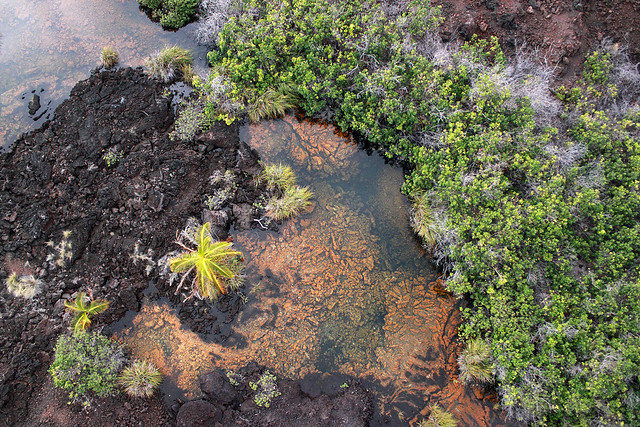
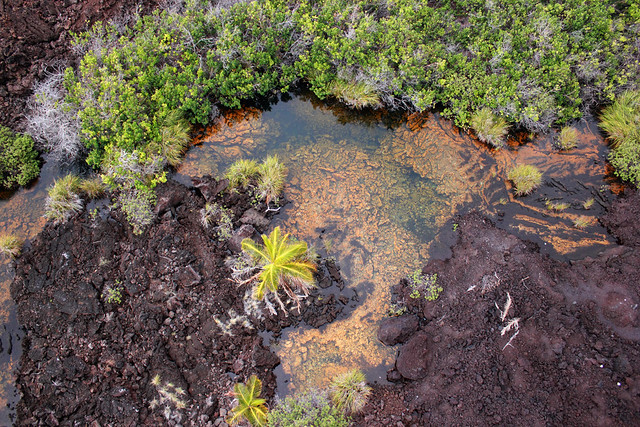
Except for the two KAP photos at the end all of these were done using the helmet cam. I had both the Gopro and the A2200 on intervalometer mode. Unfortunately I’d left the A2200 set for videos rather than stills, so all I got from it was a series of three second videos made every five seconds. GAAH! All of the helmet cam still photos were from the Gopro. I’m not partial to the Gopro’s fisheye effect when making stills, so I used PTLens to de-fisheye the frames. They were then cropped to a 3:2 ratio in Photoshop. Note to self: double check the mode of the camera next time!
Outing #2: Slope Soaring Videography
The other reason I built the helmet cam was to make slope soaring videos. Slope soaring is one of my favorite ways to fly RC aircraft. It requires no motor, no aero-tow, no high-start, no nothing. You just toss your plane off of a high place and use the wind to create lift. It’s about as close to pure flying as you can get. It also doesn’t cost an arm and a leg to do, which is great for someone like me. All it takes is a plane, a slope, and some wind. Honestly, it’s about as close as an RC airplane can come to a kite. (Hmmmm! Now I know why I like it so much!)
The day after the KAP session at the anchialine ponds I took my Zagi 5C and my helmet cam out to the cinder cone near Kua Bay. This has been a popular slope soaring site on the Big Island for many many years. It’s a good place to fly, but folks who are more used to grassier slopes may find the landing zone a little harsh.
I wanted to test two things: First, I wanted to make videos with both the Gopro and the A2200. Second, I wanted to make a set of stills to see how the fields of view compared. For this test I had the A2200 zoomed all the way in.
I should probably preface the rest of this by saying that with the exception of one Bixler flight, I haven’t flown a plane in months. I certainly haven’t flown slope. The wind was coming from an oddball quarter, so the lift zone wasn’t where I was used to finding it. All of this combined to make for challenging flying. Throw the helmet cam into the mix and I had a hard time splitting my attention between flying the plane and aiming the camera. I eventually did get the hang of it, but in the beginning I made a lot of short flights that ended with abrupt landings.
The reflex sight made it very easy to keep the camera pointed at the plane. When making stills I found it helped to set the shutter sound as loud as I could. The camera was running a five second intervalometer, so every five seconds I heard a loud “kachunk” sound, letting me know it had taken a picture. After a while my flying fell into a cadence of one-two-three-four-click! one-two-three-four-click! At around four seconds I found myself rolling the plane so I could see the top or bottom of the wing. This was great for photography, but it exacerbated my tendency to fly off the lift. Still, the pictures were nice.
You don’t even want to see the corresponding Gopro shot from that point in time. The plane is just a dot out toward the water. The long reach of the A2200 really brought the plane in close, and the reflex sight made it easy to keep it in the frame.
Videos were a little tougher. As a test I ran the Gopro in wide mode, the A2200 zoomed all the way in, an 808 #16D keychain camera on the Zagi, and my T2i on the ground on a tripod. The T2i footage was rubbish, but the rest came out ok. I also recorded audio using a portable field recorder. My audio work isn’t all that hot, but the video came out better than I expected.
I ran into two big problems: The first was that even a tiny lapse in concentration was enough for the plane to move out toward the edge of the field in the A2200. When I really focused, it worked better. I tried putting the dot near the plane rather than directly on it so that I could shift it around in the frame. This didn’t work out too well. The field of view of the A2200 was so small, even tiny shifts were enough for it to slide out toward the edge of the frame. But with judicious editing most of those lapses could have been covered. I didn’t cover them because I wanted to see the faults with the method as well as its strengths.
The second problem I ran into was that keeping the horizon level was non-trivial. I never realized how much we roll our heads when we turn our necks. It’s astounding how much the horizon bobbled a round in the video! By the end, though, my rolly-polly horizon was getting better.
I think both of these problems would have been minimized if I hadn’t been the one flying the airplane. The helmet cam certainly lets you document your own flights. But I think its real strength may be in videoing the flights of others.
– Tom

World Wide KAP Week 2014 Recap « The View Up Here said
[…] and headed down to the anchialine ponds near the old village of Wainanalii. I wrote about this in another post. Just prior to WWKW I’d finished work on an aimable helmet cam. I tried using it to document […]